
- Home
- Patterns
- Home & Decor
- Free Crochet Teddy Bear Pattern (Moveable Joints)
Crochet Pattern & Guide · For home & decor & other pets
Free Crochet Teddy Bear Pattern (Moveable Joints)
Classic heirloom small teddy bear with 4 moveable button joints, oval foundation feet, and sculpted muzzle. Includes step-by-step counts and collector PDF.
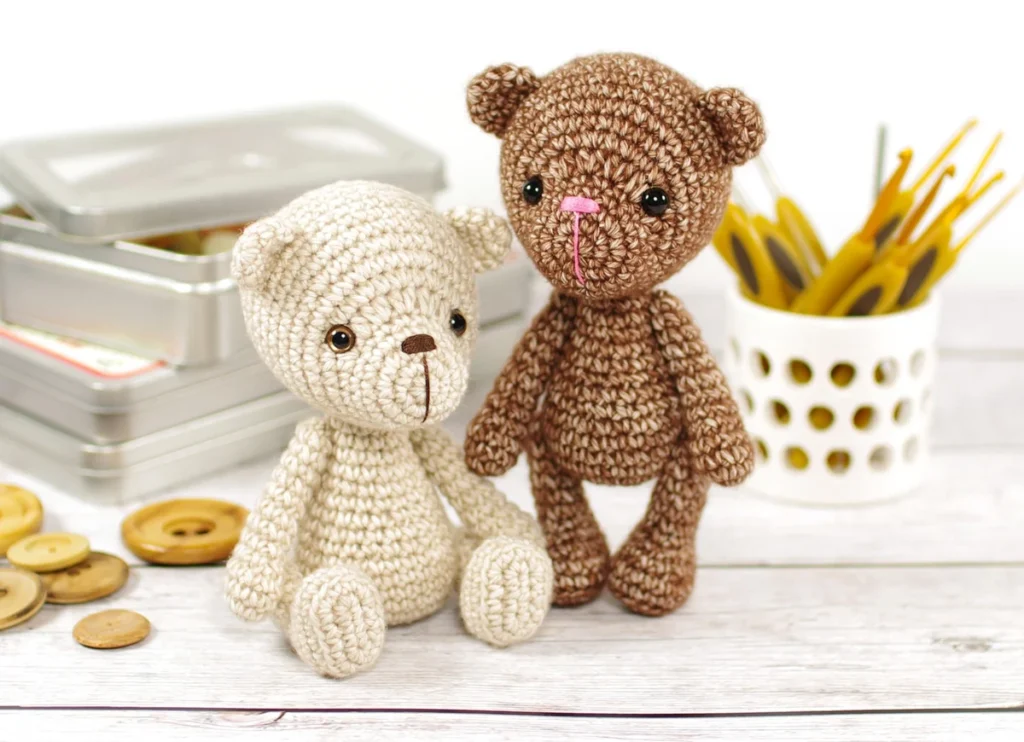
Searching for a timeless, pocket-sized crochet teddy bear pattern with moveable arms and legs? Meet our Small Heirloom Teddy Bear: a classic 15.5 cm (6-inch) poseable companion designed with traditional button-and-thread joints, sweet oval paws, and needle-sculpted facial features. Unlike static one-piece plushies, this jointed teddy can stand proudly on a shelf, sit neatly on your desk, or raise his arms for a hug. Whether you are crafting a cherished baby shower heirloom or a vintage miniature companion, this comprehensive free guide covers every round, joint installation, and sculpting step.
Prefer the Ad-Free Printable PDF Pattern?
Get the complete, printer-friendly 15-page collector’s PDF featuring 75 high-resolution step-by-step tutorial photos, row-by-row checkboxes, full assembly placement guides, and complete multi-language editions in English (US), Deutsch, Français, Español, and Italiano for only $3.50 on Etsy.

Materials & Sizing Specifications
- Yarn: Scheepjes “Stone Washed” (sport weight cotton-acrylic blend, 50 g = 130 m / 142 yds, 8 ply / 12 wpi / 3: Light). Approx. 28 g needed per bear. Suggested shades: Moon Stone (off-white cream) or Brown Agate (warm mocha).
- Crochet Hook: 2.50 mm – 3.00 mm (US size 2/C – 3/D). Opt for 2.50 mm for tight, dense stitches that prevent white polyfill from peeking through.
- Joints (4 Moveable Joints): Four 2-hole flat craft buttons (approx. 12–15 mm) or 15 mm plastic doll safety joints, paired with heavy-duty thread (nylon upholstery thread or doubled cotton embroidery floss).
- Safety Eyes: One pair of 8 mm (1/3″) black plastic safety eyes with locking washers (or black embroidery floss for infant-safe stitched eyes).
- Facial Embroidery: Black or dark brown cotton embroidery floss for the nose and smile line.
- Stuffing: High-resilience polyester fiberfill (stuff firmly in torso for sitting stability).
- Notions: Blunt steel tapestry needle, long doll needle (essential for button jointing), locking stitch markers, and sharp thread snips.
Stitch Key & Technique Notes (US Terms)
- MR: Magic Ring (adjustable loop)
- ch: Chain stitch
- sc: Single crochet
- hdc: Half double crochet
- inc: Single crochet increase (2 sc in the same stitch)
- inc3: 3 sc in the same stitch
- hdc-inc: Work 2 hdc in the same stitch
- dec: Invisible single crochet decrease (insert in front loops of next 2 sts, yarn over, pull through, pull through 2)
- BLO: Back Loop Only
- sl st: Slip stitch
- [ … ] × N: Repeat the bracketed sequence N times
- (number): Total stitch count at the end of the round
The Button & Thread Jointing Secret
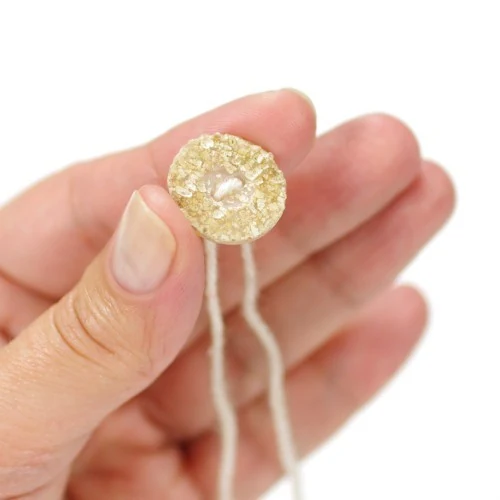
To give your teddy bear charming 360-degree poseable mobility without expensive doll hardware, this pattern utilizes internal button jointing. A small flat button sits inside the top of each limb, anchored through the body walls with high-tensile doubled thread. When pulled taut and double-knotted, the limbs rotate smoothly and stay firmly seated.
Part 1: The Head & Muzzle (Rounds 1–22)
The head begins at the snout tip and expands with sculpted half-double crochet increases across the cheeks to form an adorable, pronounced 3D muzzle.
Round 1: In Magic Ring, work 6 sc. Pull ring closed. (6)
Round 2: inc × 6. (12)
Round 3: sc, inc × 3, sc 3, inc × 3, sc 2. (18)
Rounds 4–5: sc in each stitch around (2 rounds). (18)
Tip: On round 6, place a locking stitch marker between stitches 13 and 14 to mark the center of the face. Use this marker as your visual guide for eye alignment.
Round 6: sc 6, hdc-inc × 7, sc 5. (25)
Round 7: sc 5, inc, (sc, inc) × 8, sc 3. (34)
Round 8: inc, sc 15, inc, sc 3, inc, sc 13. (37)
Round 9: sc 15, inc, sc 4, inc, sc 4, inc, sc 11. (40)
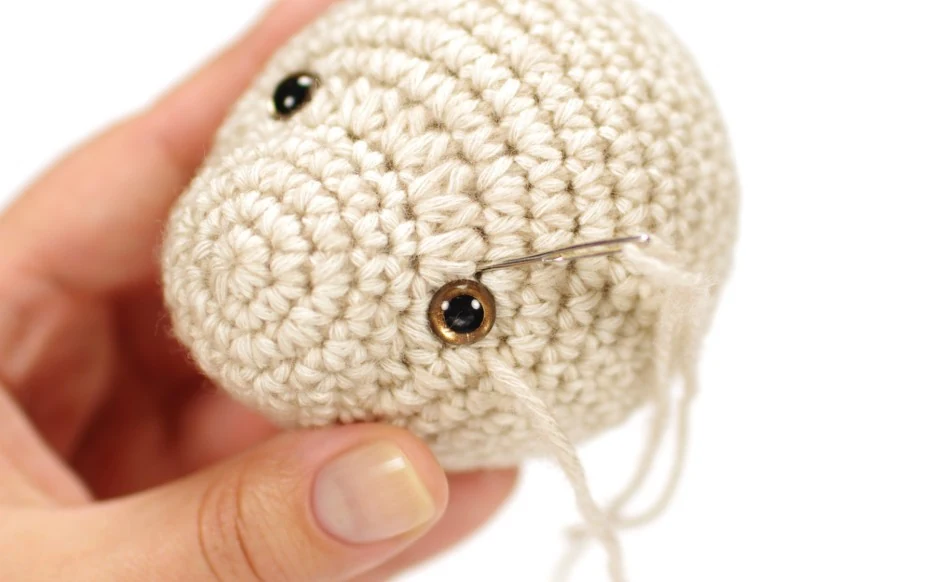
Eye Placement: Place 8 mm safety eyes on either side of your center stitch marker between Rounds 6 and 7, leaving 10 stitches (count 9 holes) between them. Secure locking washers firmly on the inside.
Rounds 10–15: sc in each stitch around (6 rounds). (40)
Round 16: sc 3, dec, (sc 8, dec) × 3, sc 5. (36)
Round 17: (sc 7, dec) × 4. (32)
Start stuffing the head firmly. Keep adding small tufts of fiberfill after every subsequent decrease round.
Round 18: sc 2, dec, (sc 6, dec) × 3, sc 4. (28)
Round 19: (sc 5, dec) × 4. (24)
Round 20: (dec, sc 2) × 6. (18)
Round 21: (sc, dec) × 6. (12)
Round 22: dec × 6. (6)
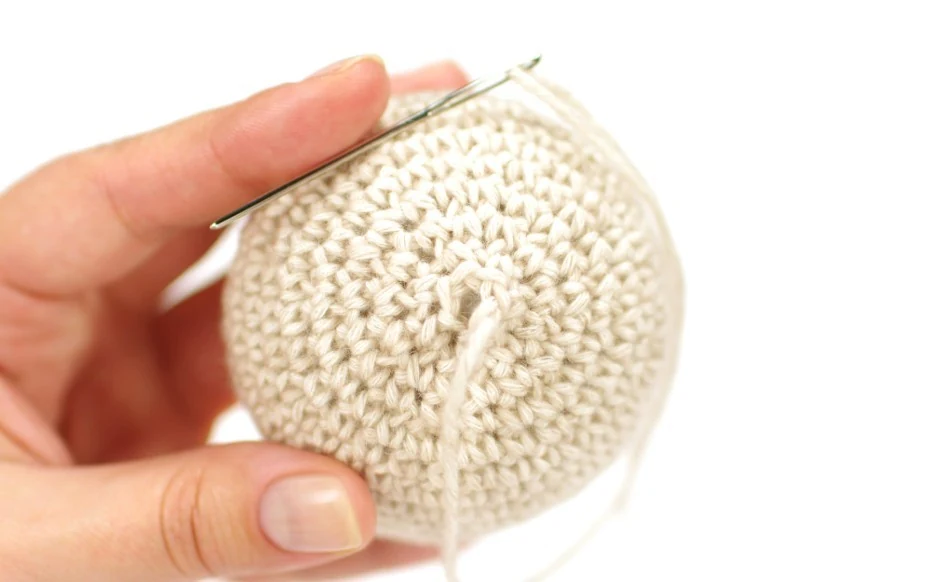
Finish stuffing head firmly. Cut yarn leaving a long tail. Thread onto a blunt needle, pick up the front loops of all 6 remaining stitches, pull tight to cinch closed, and weave needle to the bottom base of the head.
Part 2: Facial Needle-Sculpting & Nose Embroidery
Needle-sculpting transforms an ordinary spherical head into a soulful, expressive heirloom bear:
- Indent the Eye Sockets: Thread your tapestry needle with matching body yarn. Insert needle from the neck base between rounds 11 and 12, emerge at the outer corner of the first eye, pass over the eye, re-insert directly beside it, and emerge back at the neck base. Gently tug both yarn tails until the eye indents slightly into the head, then tie a firm double knot. Repeat for the second eye.
- Embroider the Satin Nose: Using black embroidery floss, make a single vertical guide stitch over the first 3 snout rounds. Then work smooth, horizontal satin stitches across the muzzle tip until you form a plump, rounded triangular nose. Bring thread down into a neat vertical mouth line.
Part 3: Ears & Arms
Ears (Make 2)
Round 1: In Magic Ring, work 6 sc. (6)
Round 2: (inc × 2, sc) × 2. (10)
Rounds 3–4: sc in each stitch around (2 rounds). (10)
Sl st in next st. Cut yarn leaving a sewing tail. Do not stuff the ears! Pinch them flat to create a natural curved dish shape.
Right Arm (Make 1)
Round 1: In Magic Ring, work 6 sc. (6)
Round 2: (inc × 2, sc) × 2. (10)
Rounds 3–4: sc in each stitch around (2 rounds). (10)
Round 5: sc, dec × 2, sc 2, inc, sc 2. (9)
Round 6: sc, dec, sc 3, inc, sc 2. (9)
Round 7: sc, dec, sc 6. Stuff hand firmly. (8)
Round 8: sc in each stitch around. (8)
Round 9: sc, dec, sc 5. (7)
Rounds 10–12: sc in each stitch around (3 rounds). (7)
Round 13: sc 5, dec. (6)
Position button joint inside limb between R12 & R13 with thread tails facing inward toward body. Stuff arm lightly in upper section, cinch opening closed, and leave thread tails accessible for body attachment.
Left Arm (Make 1)
Round 1: In Magic Ring, work 6 sc. (6)
Round 2: (inc × 2, sc) × 2. (10)
Rounds 3–4: sc in each stitch around (2 rounds). (10)
Round 5: sc 2, inc, sc 2, dec × 2, sc. (9)
Round 6: sc 2, inc, sc 3, dec, sc. (9)
Round 7: sc 7, dec. Stuff hand firmly. (8)
Round 8: sc in each stitch around. Sc in next 2 sts; count last sc as new end of round. (8)
Round 9: sc 5, dec, sc. (7)
Rounds 10–12: sc in each stitch around (3 rounds). (7)
Round 13: sc 2, dec, sc 3. (6)
Insert button joint between R12 & R13, finish stuffing, and cinch opening closed.
Part 4: Legs & Shaped Oval Foot Base (Make 2)
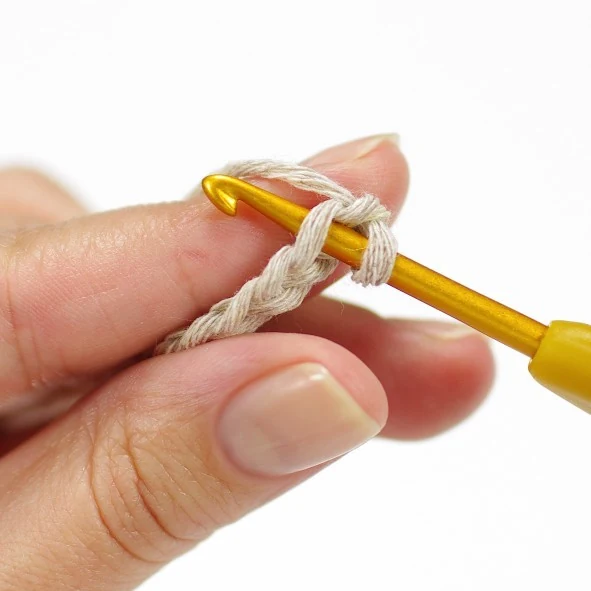
To give the teddy bear realistic flat soles that can sit upright, Round 1 is worked around both sides of a foundation chain:
Foundation: Chain 5.
Round 1 (Crochet around chain): 2 sc in 2nd ch from hook, sc 2, 4 sc in 1st ch. Rotate work 180° to crochet into opposite side of chain loops: sc 2, 2 sc in last ch. (12)
Round 2: inc, sc 3, inc3, sc 2, inc3, sc 3, inc. (18)
Round 3 (BLO): Work in Back Loops Only: sc in each stitch around. This forms the crisp, flat foot sole ridge! (18)
Round 4: Work in both loops: sc in each stitch around. (18)
Round 5: sc 5, dec × 2, sc, dec × 2, sc 4. (14)
Round 6: sc 5, dec × 3, sc 3. (11)
Round 7: sc 4, dec, sc, dec, sc 2. (9)
Rounds 8–12: sc in each stitch around (5 rounds). Stuff foot firmly. (9)
End of round alignment: For Left Leg, work 7 sc (new end of round). For Right Leg, work 2 sc (new end of round).
Joint Preparation: Insert button joint between Rounds 11 and 12 with post facing straight towards the body.
Round 13: (sc, dec) × 3. (6)
Finish stuffing leg, thread yarn tail onto needle, pick up front loops of remaining 6 stitches, pull tight to cinch closed, and weave yarn ends inside.
Part 5: Body & Moveable Joint Installation (Rounds 1–19)
The body is crocheted from the bottom base up to the neck. Limbs are attached as you crochet, ensuring secure internal knotting before the torso is closed.
Round 1: In Magic Ring, work 6 sc. (6)
Round 2: inc × 6. (12)
Round 3: (sc, inc) × 6. (18)
Round 4: (inc, sc 2) × 6. (24)
Round 5: (sc 5, inc) × 4. (28)
Rounds 6–9: sc in each stitch around (4 rounds). (28)
Attach Legs: Turn body so the end of Round 9 faces away (center back). Pass joint threads from the legs through the body walls between Rounds 6 and 7. Thread through an interior button, pull firmly, tie three secure knots, and dab with fabric glue if desired. Stuff lower body firmly to create a solid sitting base.
Round 10: sc 6, dec, sc 3, dec, sc 2, dec, sc 3, dec, sc 6. (24)
Round 11: sc in each stitch around. (24)
Round 12: sc 3, dec, (sc 6, dec) × 2, sc 3. (21)
Round 13: sc in each stitch around. (21)
Round 14: (dec, sc 5) × 3. (18)
Round 15: sc in each stitch around. (18)
Attach Arms: Pass arm joint threads through the sides of the body between Rounds 15 and 16. Fasten securely inside the body with internal buttons and double knots. Finish stuffing torso firmly.
Round 16: sc 2, dec, (sc 4, dec) × 2, sc 2. (15)
Round 17: sc in each stitch around. (15)
Round 18: sc 7, dec, sc 6. (14)
Round 19: sc 4, leave remaining stitches unworked. (14)
Sl st in next st. Cut yarn leaving a long sewing tail for head attachment. Pack extra fiberfill into the neck cavity.
Part 6: Final Heirloom Assembly
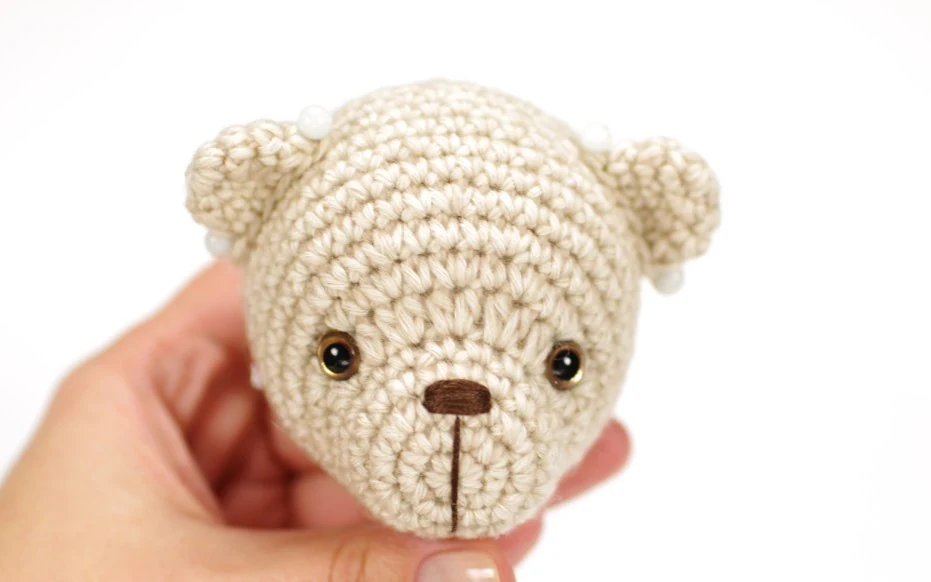
- Sew Ears to Head: Position ears symmetrically just behind Round 12 of the head, leaving 9 to 10 stitches between them. Pin securely and sew following the curved ear contour. Weave thread ends into the head base.
- Whip-Stitch Head to Body: Align the head onto the neck opening, positioning the front edge of the body opening just behind Round 9 of the head. Using your long sewing tail and a blunt tapestry needle, whip-stitch around the neck catching both loops of every stitch.
- The Anti-Wobble Neck Trick: Before sewing the final 3 stitches shut, use forceps or the back of a crochet hook to pack an extra firm pinch of fiberfill directly into the neck seam. This eliminates head flop and ensures your teddy sits with proud, upright heirloom posture!
Get the 15-Page Collector’s Edition PDF
Take this pattern offline to your favorite crafting nook! Download the high-res 15-page printable PDF on Etsy featuring 75 visual step-by-step photos, full button jointing schematics, and complete multi-language editions in English, German, French, Spanish, and Italian for just $3.50.
We Share Free Premium PDF Patterns Every Week!
Join our weekly subscriber list to get free, ad-free printable PDF crochet patterns delivered straight to your inbox every week. Enter your email below to get this week’s pattern now!
🔒 100% free forever. No spam, ever. Unsubscribe with 1-click anytime.


