- Home
- Patterns
- Home & Decor
- Free Crochet Bunny Dollhouse Pattern: Christmas Playset with Micro Bunny & Tree
Crochet Pattern & Guide · For home & decor
Free Crochet Bunny Dollhouse Pattern: Christmas Playset with Micro Bunny & Tree
5-in-1 Christmas crochet pattern: 2-story gingerbread dollhouse with micro bunny, miniature Christmas tree, scalloped garland, and bedding.
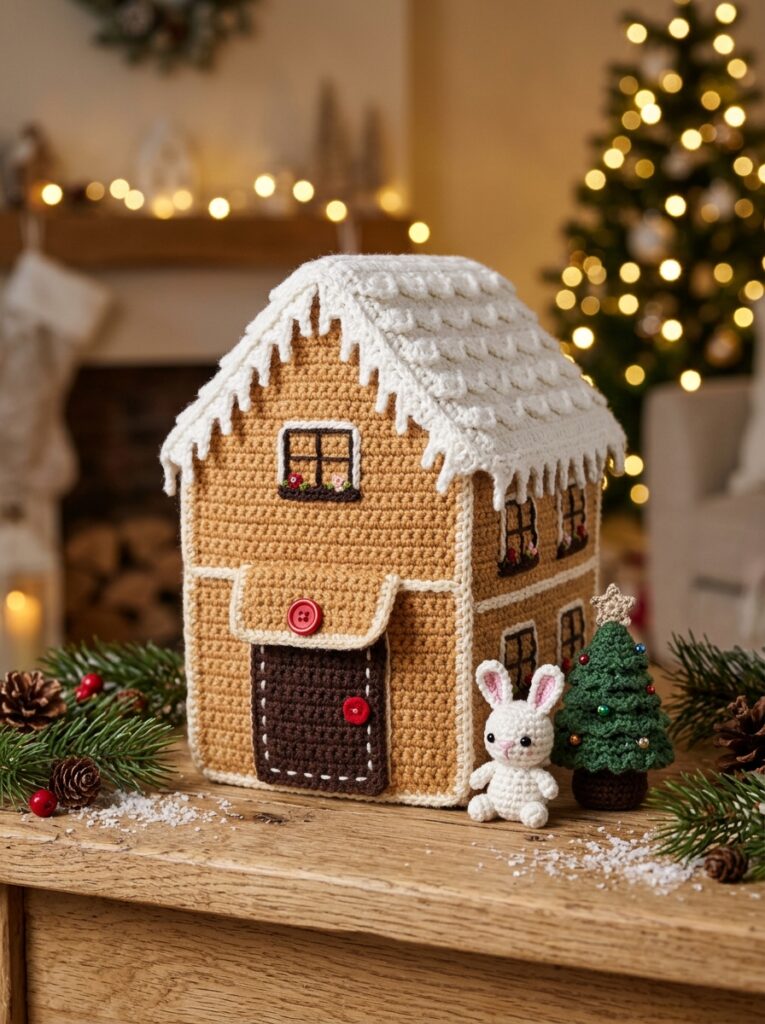
Discover the enchanting world of miniature holiday crafting with this complete free crochet Christmas Bunny Dollhouse playset pattern! Measuring just 4.5 cm × 4.5 cm × 7 cm (approx. 1.7″ × 1.7″ × 2.7″), this ingenious two-story gingerbread cottage opens like a storybook on a crocheted spine hinge, revealing two furnished floors, an attic bedroom, snow-trimmed roof, and a button clasp. Inside lives an adorable Micro Bunny with seamless arms, popcorn feet, and direct-crochet ears, accompanied by her miniature evergreen Christmas tree, snowy ground base, festooned garland, and cozy bedding set!
🏡 Structural Stability & Crafting Secrets
Internal Wire Frame: To ensure the dollhouse walls and roof stand crisp, solid, and upright when opened, a discreet floral craft wire frame is crocheted directly into the perimeter borders. Tight tension is essential! Choose 100% cotton yarn so the gingerbread walls remain firm and sharp.
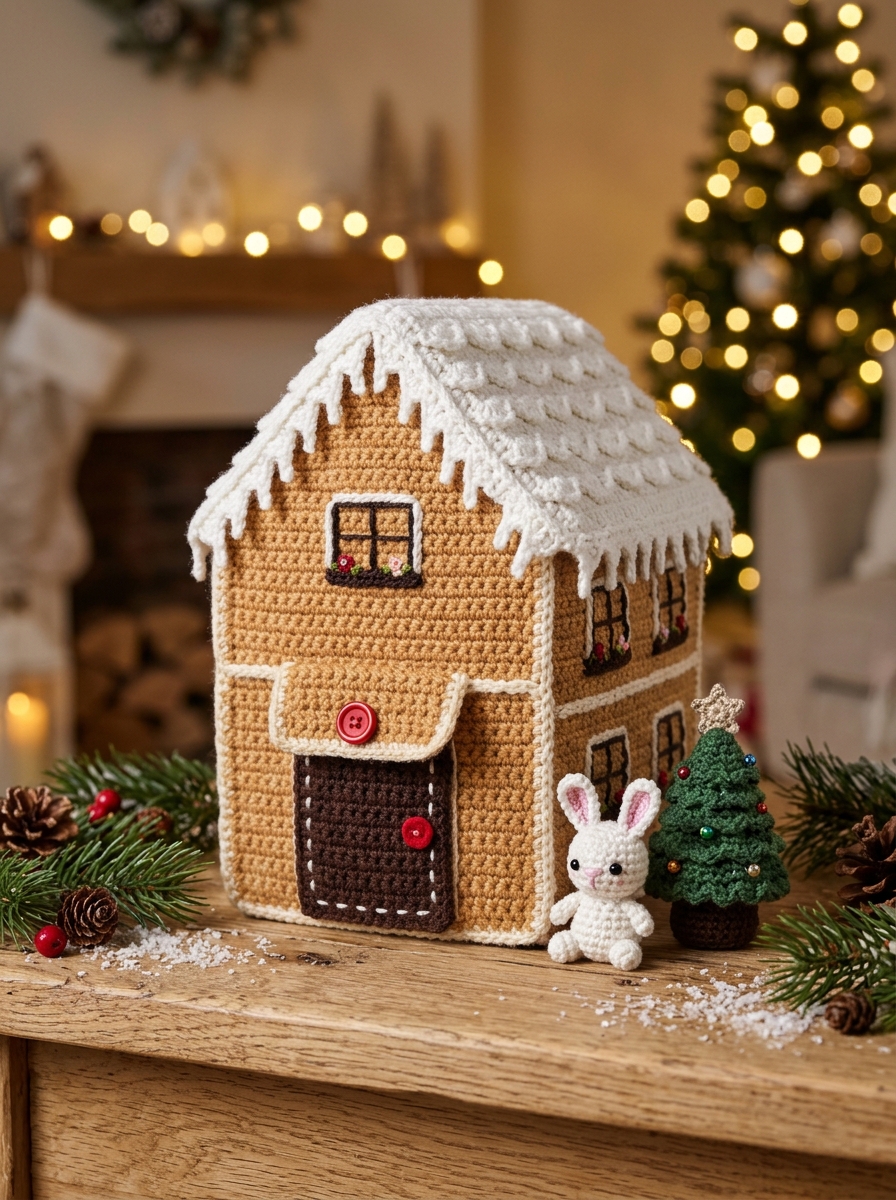
1.7″ × 1.7″ × 2.7″ (4.5 × 4.5 × 7 cm)
Intermediate / Miniature Specialist
1.75 mm (House & Tree), 1.0 mm (Bunny)
Fine #2 Cotton DK & Micro Lace Thread
Materials & Tools Required
- Yarn for Dollhouse (100% Cotton, 100g/200m / Weight #2 Fine/DK):
- Yarn A (Beige / Gingerbread): ~30 g for walls, floors, attic, and structural frames.
- Yarn B (White / Snow): ~20 g for snow roof, ground base, and roof borders.
- Yarn for Accessories & Micro Bunny:
- Green Cotton Yarn: ~10 g (matching weight) for the evergreen Christmas tree.
- Micro Lace Thread (650m / 100g or #10/20 crochet thread): White or cream for the micro bunny; sewing thread for facial embroidery and garland.
- Crochet Hooks: 1.75 mm (US Steel 4 / UK 2) for dollhouse, tree, and bedding; 1.00 mm for micro bunny and roof garland.
- Wire & Notions:
- Floral craft wire / tape wire (~40 cm total length: 19.5 cm for Part 1, 17.5 cm for Part 2).
- Round-nose pliers (for bending and securing wire loop joints).
- Small decorative button (approx. 8 mm diameter) for clasp closure.
- Ruler/tape measure, tapestry needle, sharp embroidery needle, tiny pinch of polyfill stuffing.
- Pink textile marker or pastel chalk (for bunny’s rosy cheeks).
Part 1: Dollhouse Main Section (First Half)
1. Floors (Make 3 Identical Details in Yarn A – Beige)
Work 2 details and fasten off. On the 3rd detail, do not cut the yarn (continue directly into walls):
- Row 1: Make a foundation chain of 9 stitches. Sc in second chain from hook, sc in each chain across. [8 sc]
- Rows 2 – 4 (3 rows): Ch 1, turn, sc in each st across. [8 sc]
- Trim Border Row: Ch 1, work 4 sc evenly spaced along the edge to the corner; work 2 sc into corner; 6 sc across bottom; 2 sc into next corner; 4 sc evenly spaced from edge to corner. [18 sc]
Fasten off and cut yarn on details 1 and 2. Leave yarn attached on detail 3.
2. Walls & Window Openings (Yarn A – Beige)
Turn back the 3rd floor detail (facing the wrong side):
- Row 1: Ch 1, make 18 sc through the back loop of the last trim row (the loop farther from you). [18 sc]
Section 1 (First Wall Pillar):
- Rows 2 – 4 (3 rows): Ch 1, turn, 2 sc. [2 sc]
Section 2 (Ground Floor Window Cutout):
- Row 2: Ch 4, skip 2 stitches of bottom wall row, insert hook into 3rd st and work 10 sc across. [10 sc]
- Row 3: Ch 1, turn, 9 sc across, 1 sc hitching up the loop of the chain space. [10 sc]
- Row 4: Sl st into the loop of the chain, turn, 10 sc across. [10 sc]
Section 3 (Corner Wall Pillar):
- Row 2: Ch 4, skip 2 stitches of bottom wall row, insert hook into 3rd st and work 2 sc. [2 sc]
- Row 3: Ch 1, turn, 1 sc, 1 sc hitching up the loop of the chain. [2 sc]
- Row 4: Sl st into loop of chain, turn, 2 sc. [2 sc]
Rejoining All Sections Across First Floor:
- Row 5: Ch 1, turn, 2 sc in each st, 2 sc into chain space, 10 sc in each st, 2 sc into chain space, 2 sc in each st. [18 sc]
- Row 6 (Installing Second Floor): Turn. Take 1 finished floor detail. Ch 1, make 18 sc working simultaneously through the back loops of the walls and the back loops of the floor detail to lock the floor horizontally. [18 sc]
- Row 7: Ch 1, turn, sc in each st of row. [18 sc]
Second Floor Window Openings:
- Upper Section 1 (Rows 8 – 10): Ch 1, turn, 6 sc across. [6 sc]
- Upper Section 2 (Upper Window):
- Row 8: Ch 4, skip 2 sts of bottom row, insert hook in 3rd st and sc 2. [2 sc]
- Row 9: Ch 1, turn, 1 sc, 1 sc hitching up chain loop. [2 sc]
- Row 10: Sl st into chain loop, turn, 2 sc. [2 sc]
- Upper Section 3:
- Row 8: Ch 4, skip 2 sts of bottom row, insert hook in 3rd st and sc 6. [6 sc]
- Row 9: Ch 1, turn, 5 sc, 1 sc hitching up chain loop. [6 sc]
- Row 10: Sl st into chain loop, turn, 6 sc. [6 sc]
- Row 11 (Rejoining Across Second Floor): Ch 1, turn, 6 sc, 2 sc into chain space, 2 sc, 2 sc into chain space, 6 sc. [18 sc]
- Row 12 (Installing Attic Floor): Turn. Take 2nd floor detail. Ch 1, make 18 sc working through back loops of walls and back loops of floor detail together. [18 sc]
Do not fasten off! Continue directly to the Attic.
3. Gabled Attic (Yarn A – Beige)
- Row 1: Ch 1, turn, 5 sl st along top of wall, ch 1, 8 sc. [8 sc]
- Row 2: Ch 1, turn, dec, 4 sc, dec. [6 sc]
- Row 3: Ch 1, turn, dec, 2 sc, dec. [4 sc]
- Row 4: Ch 1, turn, 2 dec. [2 sc]
- Row 5: Ch 1, turn, dec [1 sc], ch 1, 5 sl st down the attic gable edge, 5 sl st along top of the wall.
Do not fasten off!
4. Snow-Covered Roof (Yarn B – White)
- Row 1: Make a foundation chain of 7 stitches with Yarn B. Sc in second chain from hook, sc in each chain across. [6 sc]
- Row 2: Ch 1, work 4 sc through the last walls row and previous roof row together; 1 sc through last walls and roof rows hitching up the first attic row; 1 sc. [6 sc]
- Rows 3 – 12 (10 rows): Ch 1, turn, work 6 sc across each row, hitching the attic edge stitch on each alternating row to join seamlessly without needle sewing. [6 sc each row]
- Row 13: Ch 1, turn, 1 sc, 5 sc pulling thread through stitches of the last wall row. [6 sc]
- Row 14: Ch 1, turn, 6 sc across. [6 sc]
- Row 15: Ch 1, turn, 6 sl st into previous row, ch 1, 2 sl st along frontal roof border.
5. Part 1 Wire Frame Installation
- Measure the outer perimeter borders of Part 1 (approx. 19 cm / 7.5″). Cut floral craft wire to 19.5 cm. Bend and join the wire ends into a firm closed loop using round-nose pliers.
- Crochet Over Wire with Yarn A (Beige): Insert hook into loop of Yarn A: ch 1, sc 6 along 2nd floor edge, sc 6 along 1st floor edge, sc 10 along floor bottom into BACK loop, sc 6 along other side of 1st floor, sc 6 along other side of 2nd floor [34 sc over wire]. Fasten off and cut yarn.
- Crochet Over Wire with Yarn B (White): Insert hook into loop of Yarn B: sc 6 over frame before wire joint, sc 6 over frame after wire joint, 2 sl st along frontal roof border, ch 1, 6 sl st along left roof border. Fasten off and weave in ends.
6. Ground Snow Base (Yarn B – White)
- Row 1: Insert hook into front loops of bottom Floor detail (not the wire frame!): work 28 sc across. [28 sc]
- Row 2 (Worked in Spirals): 1 inc, 8 sc, 2 inc, 2 sc, 2 inc, 8 sc, 2 inc, 2 sc, 1 inc. [36 sc]
- Row 3: 1 inc, 10 sc, 2 inc, 4 sc, 2 inc, 10 sc, 2 inc, 4 sc, 1 inc. [44 sc]
- Row 4: 1 inc, 2 sc, 1 hdc, 6 dc, 1 hdc, 2 sc, sl st. [14 sts]
Fasten off and neatly weave in all yarn ends.
Part 2: Dollhouse Opening Front Section (Second Half)
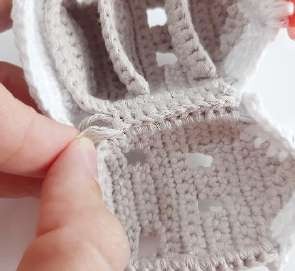
1. Floor Detail (Yarn A – Beige)
- Row 1: Foundation chain of 9 stitches. Sc in 2nd ch from hook, sc in each ch across. [8 sc]
- Row 2: Ch 1, turn, 8 sc. [8 sc]
- Trim Row: Ch 1, work 2 sc evenly along edge to corner, 2 sc into corner, 6 sc across, 2 sc into next corner, 2 sc along edge to corner. [14 sc]
Do not fasten off!
2. Front Walls & Windows
- Row 1: Make 14 sc through the back loop of the last trim row. [14 sc]
- Section 1 (Rows 2 – 4): Ch 1, turn, 2 sc. [2 sc]
- Section 2:
- Row 2: Ch 4, skip 2 sts of bottom wall row, insert hook into 3rd st and sc 6. [6 sc]
- Row 3: Ch 1, turn, 5 sc, 1 sc hitching up chain loop. [6 sc]
- Row 4: Sl st into chain loop, turn, 6 sc. [6 sc]
- Section 3:
- Row 2: Ch 4, skip 2 sts of bottom wall row, insert hook into 3rd st and sc 2. [2 sc]
- Row 3: Ch 1, turn, 1 sc, 1 sc hitching up chain loop. [2 sc]
- Row 4: Sl st into chain loop, turn, 2 sc. [2 sc]
- Row 5 (Rejoining First Floor): Ch 1, turn, 2 sc, 2 sc into chain space, 6 sc, 2 sc into chain space, 2 sc. [14 sc]
- Rows 6 – 7 (2 rows): Turn, ch 1, 14 sc across. [14 sc]
- Upper Section 1 (Rows 8 – 10): Ch 1, turn, 4 sc across. [4 sc]
- Upper Section 2:
- Row 8: Ch 4, skip 2 sts, sc 2. [2 sc]
- Row 9: Ch 1, turn, 1 sc, 1 sc hitching chain loop. [2 sc]
- Row 10: Sl st into chain loop, turn, 2 sc. [2 sc]
- Upper Section 3:
- Row 8: Ch 4, skip 2 sts, sc 4. [4 sc]
- Row 9: Ch 1, turn, 3 sc, 1 sc hitching chain loop. [4 sc]
- Row 10: Sl st into chain loop, turn, 4 sc. [4 sc]
- Row 11 (Rejoining Second Floor): Ch 1, turn, 4 sc, 2 sc into chain space, 2 sc, 2 sc into chain space, 4 sc. [14 sc]
- Row 12: Turn, ch 1, 14 sc across. [14 sc]
Do not fasten off!
3. Front Gable Attic
- Row 1: Ch 1, turn, 3 sl st along last wall row, ch 1, 8 sc. [8 sc]
- Row 2: Ch 1, turn, dec, 4 sc, dec. [6 sc]
- Row 3: Ch 1, turn, dec, 2 sc, dec. [4 sc]
- Row 4: Ch 1, turn, 2 dec. [2 sc]
- Row 5: Ch 1, turn, dec [1 sc], ch 1, 5 sl st down the gable, 3 sl st along top of wall.
4. Front Roof (Yarn B – White)
- Row 1: Foundation chain of 5 stitches with Yarn B. Sc in 2nd ch from hook, sc in each across. [4 sc]
- Row 2: Ch 1, 2 sc through last wall row and roof row together, 1 sc through wall and roof hitching attic row, 1 sc. [4 sc]
- Rows 3 – 12 (10 rows): Ch 1, turn, 4 sc across each row hitching attic edge. [4 sc each row]
- Row 13: Ch 1, turn, 1 sc, 3 sc pulling thread through last wall row. [4 sc]
- Row 14: Ch 1, turn, 4 sc. [4 sc]
- Row 15: Ch 1, turn, 4 sl st into previous row, ch 1, 2 sl st along frontal roof border.
5. Part 2 Wire Frame & Buttonhole Loop
- Measure perimeter borders of Part 2 (approx. 17 cm / 6.7″). Cut craft wire to 17.5 cm and join loop with round-nose pliers.
- Crochet Over Wire with Yarn B (White): Sc 6 over frame before joint, sc 6 over frame after joint, 2 sl st along roof border, ch 1, 4 sl st along left roof border. Fasten off.
- Crochet Over Wire with Yarn A (Beige) & Make Buttonhole: Insert hook into Yarn A: make 1 ch, sc 6 along 2nd floor edge; now make the buttonhole loop: chain 9 (or count needed to snugly fit your 8 mm button), sl st into 1st loop of chain. Sc 6 along 1st floor edge, sc 10 along floor into back loop, sc 6 along other side 1st floor, sc 6 along other side 2nd floor. Do not fasten off!
- Joining Spine Hinge: Place Part 1 and Part 2 together with back edges aligned. Ch 1, make 10 sc working through the matching border stitches of both parts together to form the flexible book hinge. Fasten off and weave in tail.
- Sew Clasp Button: Sew your 8 mm decorative button between the 1st and 2nd floors on the outer front wall of Part 1, aligning with the Part 2 buttonhole loop.
Part 3: Holiday Playset Furniture & Accessories
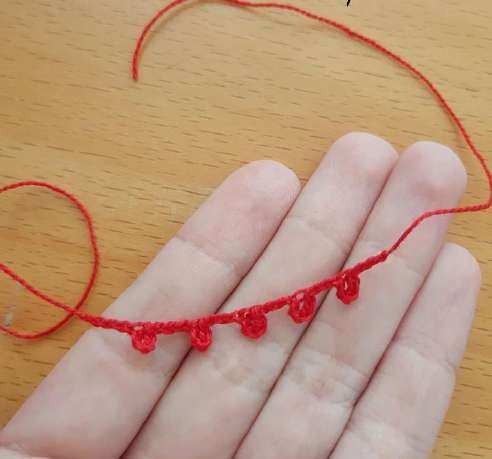
1. Festive Roof Garland (1.0 mm Hook, Fine Thread)
Leaving a long tail, ch 8, sl st into 4th ch from hook. Then work: [Ch 8, sl st into 4th ch from previous loop] × 4 times. Ch 4. Fasten off leaving a long tail. Stitch along the roof eaves or windows.
2. Miniature Evergreen Christmas Tree (1.75 mm Hook)
With green cotton yarn, make a foundation chain of 10 stitches. Sl st into 1st ch to form a ring:
- Rows 1 – 2 (2 rounds): 10 sc in continuous spiral. [10 sc]
- Row 3: [dec, 3 sc] × 2. [8 sc]
- Row 4: [dec, 2 sc] × 2. [6 sc]
- Row 5: [dec, 1 sc] × 2. [4 sc]
- Row 6: [Sl st into opposite stitch from hook] × 2 to close top tip.
Fasten off and hide yarn end. Embroider tiny bead ornaments or colored French knots if desired.
Snow Base: Join White Yarn B to the starting foundation chain of the tree: ch 1, [inc, 1 sc] × 5 [15 sc]. Fasten off and weave in ends.
3. Attic Bedding: Quilt & Pillow (1.75 mm Hook)
- Cozy Blanket: Ch 9, starting in 2nd ch from hook work 8 sc. Then work:
[Ch 1, turn, 8 sc] × 5 rowsto form a neat rectangle (6 rows × 8 stitches). Fasten off and weave in ends. - Pillow: Ch 5, starting in 2nd ch from hook work 4 sc. Then work:
[Ch 1, turn, 4 sc] × 5 rows(6 rows × 4 stitches). Fold in half and slip stitch along the 3 open sides (or sew with a needle). Hide tails inside.
Part 4: The Micro Bunny Inhabitant
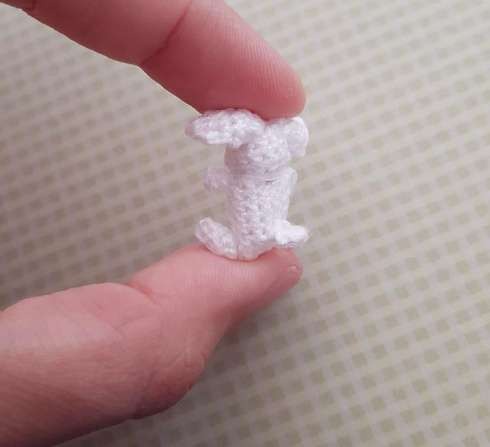
Worked with 1.00 mm crochet hook and thin lace thread (approx. 650 m / 100 g). Work in continuous spirals using a contrasting thread as a stitch marker:
Body & Head
- Row 1: 6 sc into a magic ring. [6 sc]
- Row 2: 6 inc. [12 sc]
- Rows 3 – 6 (4 rounds): 12 sc in each st around. [12 sc]
- Row 7 (Crocheting Arms Directly): Make 5 ch, starting in 2nd ch from body work 2 sc (first arm ready); work 5 sc along body; make 5 ch, starting in 2nd ch from body work 2 sc (second arm ready); work 7 sc along body. [12 sc]
- Row 8: Skip both arms and crochet normal body stitches: 12 sc around. [12 sc]
- Rows 9 – 12 (4 rounds): 12 sc around. [12 sc]
Insert a tiny pinch of fiberfill into the head and tummy (do not overstuff).
Popcorn Feet & Seaming Bottom
- Row 13: 6 sc along body. Now make first leg:
Ch 3, insert hook into 3rd ch from hook and make a 5-dc popcorn stitch (5 dc in same chain, join 1st and 5th dc with sl st). Ch 2. Put hook behind the popcorn stitch, pull yarn from behind to form a tightening loop, and crochet both loops on hook together. - Insert hook through the first sc of the last body row and the last sc of the opposite side. Make 6 slip stitches across to seam the bottom opening closed.
- Make second leg:
Ch 3, 5-dc popcorn stitch in 3rd ch, ch 2, tighten base with loop from behind and crochet 2 loops together. Make 1 sl st into body. Fasten off leaving a long yarn tail.
Tail, Neck Sculpting & Face
- Little Tail: Insert hook into center lower back, pull out yarn tail, ch 2. Insert hook under closest body stitch, make 1 dc. Ch 2, sl st into base of dc, fasten off and hide tail inside.
- Neck Sculpting: Thread a needle with matching thread, wrap around the neck between Rounds 6 and 7, and pull gently to cinch and sculpt bunny’s head. Knot securely and bury end.
- Eyes: With black embroidery thread, make two tiny French knots or single stitch marks on the face.
Direct-Crochet Long Ears (No Sewing!)
- Insert hook directly into the top side of the head where you want the first ear: pull yarn through, ch 3, work 3 dc into the same spot.
- Ch 3, turn, work 3 dc together (cluster decrease).
- Ch 2, turn, work 4 sl st down the inner edge of the ear, sl st into the head. Fasten off leaving a tail.
- Pull the yarn across to the opposite side of the head and repeat the exact same steps for the second ear. Weave tail inside.
- Touch bunny’s cheeks with a pink textile marker or chalk for adorable rosy cheeks!
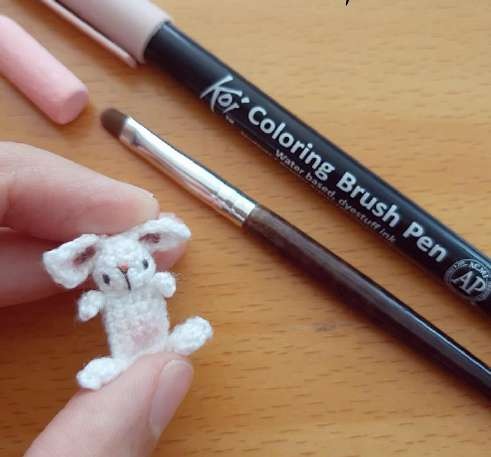
🎉 Your Miniature Holiday Playset is Complete!
Congratulations! You’ve crocheted a full-fledged miniature gingerbread dollhouse with an opening book hinge, button clasp, furnished interior, Christmas tree, and tiny resident bunny! Share your micro creation with #PetsYarn on Pinterest and Instagram!
We Share Free Premium PDF Patterns Every Week!
Join our weekly subscriber list to get free, ad-free printable PDF crochet patterns delivered straight to your inbox every week. Enter your email below to get this week’s pattern now!
🔒 100% free forever. No spam, ever. Unsubscribe with 1-click anytime.