Crochet Pattern & Guide · For cats
Lemon-Yellow Flap Hat for Cats
Free step-by-step crochet pattern for a cute lemon-yellow cat flap hat with dual ear openings, green border edging, and three two-tone tassels. Tailored for feline comfort and playful fit.
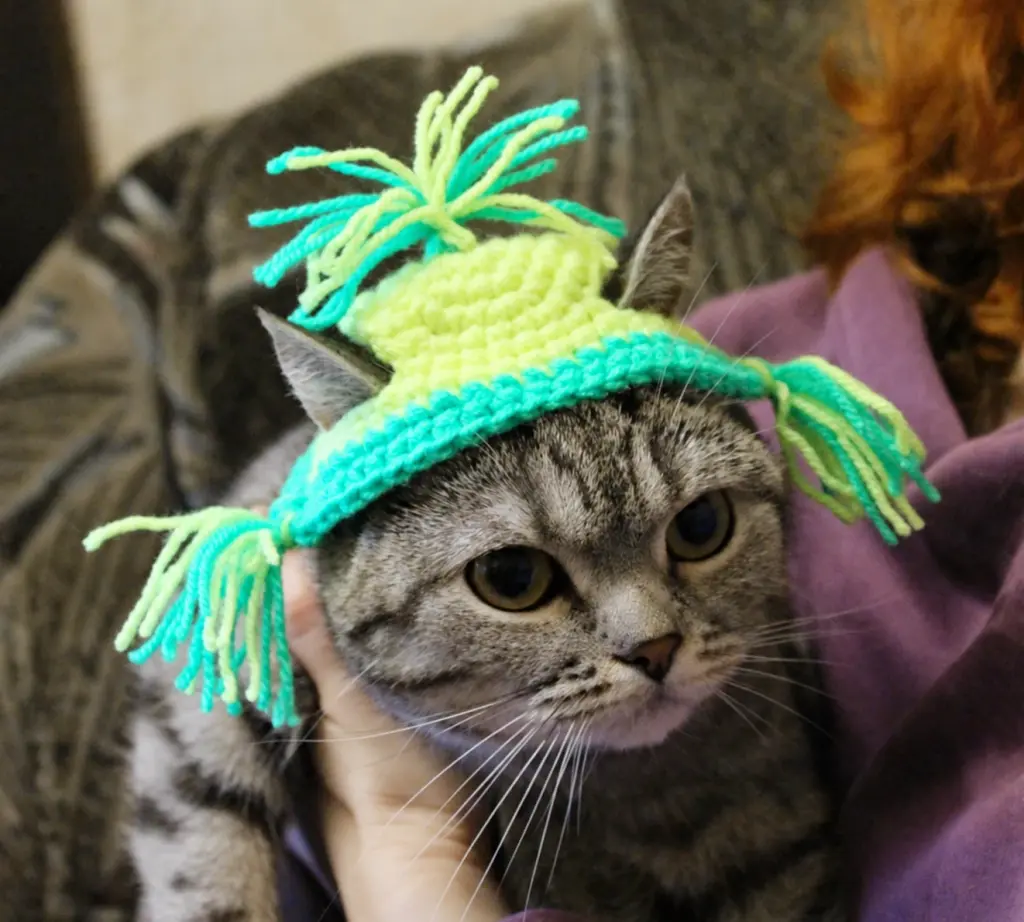
Looking for an adorable, lightweight, and pet-friendly cat hat crochet design that actually stays on? The Lemon-Yellow Flap Hat is specially engineered for cats, featuring two wide chain-stitch ear bridges that give sensitive pet ears complete freedom of movement without pinching or flattening.
Worked in vibrant citrus yellow and leafy green using two strands held together for plush texture and gentle structure, this 9-round project takes just 1 to 2 evenings to complete. Finished with three playful two-tone tassels, it makes the ultimate photo prop, winter accessory, and handmade gift for animal lovers.
What You Will Make & Sizing Specifications
- Design: A rounded citrus yellow crown with two wide side bridges for ear clearance, a shaped green scalloped edge, and three two-tone tassels.
- Approximate Dimensions: 15 cm long × 5 cm high (approx. 6 in × 2 in).
- Target Sizing: Fits standard adult cats (8–15 lbs / 3.5–7 kg). Easy to size up for larger breeds or down for kittens.
- Fit Customization: Adjust the chain length on Round 6 (ear bridges) by adding or subtracting 2 to 3 chains for wider or narrower ear sets.
Materials & Essential Tools
Yarn Requirements & Color Palette
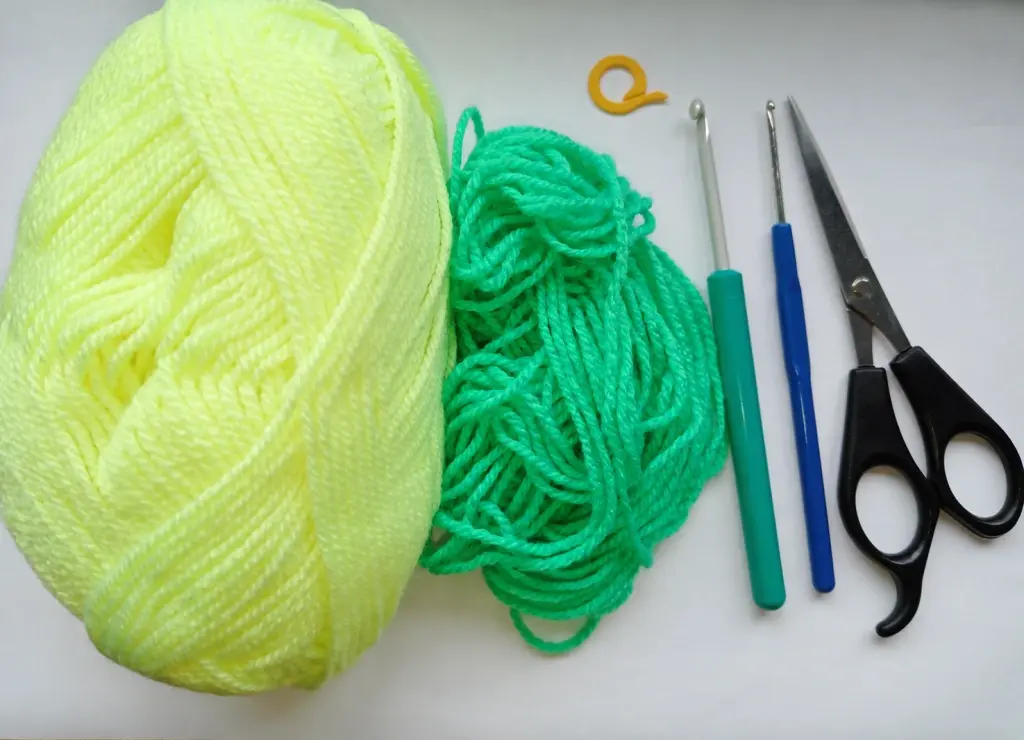
- Fiber Recommendation: 100% Acrylic or 100% Cotton, 50 g / 150 m (164 yd) per skein (Category 2 Sport / Baby fine).
- Double-Strand Technique: Work with two strands of the same color held together throughout the entire pattern to provide soft loft and sturdy structure.
- Color A (Citrus Yellow): Approx. 25 m (27 yd).
- Color B (Leafy Green): Approx. 17 m (18.5 yd).
Hooks & Notions
- Main Crochet Hook: 4.0 mm (US G/6) for hat body, ear bridges, and attaching tassels.
- Finishing Hook: 2.0 mm hook for easily weaving and hiding yarn tails inside dense stitches.
- Notions: Locking stitch marker, sharp yarn scissors, measuring tape.
Crochet Abbreviations & Stitch Glossary (US Terms)
Step-by-Step Written Pattern Instructions
Part 1: The Crown (Rounds 1–5)
Using Yellow yarn (2 strands held together) and your 4.0 mm hook, we build the rounded top of the hat.

- Round 1: Make an adjustable magic ring (MR), work 6 sc into the ring. Pull starting tail firmly to close center. [6 sts]
- Round 2: Work 1 inc in every stitch around. [12 sts]
- Round 3:
(1 sc, inc) × 6times. [18 sts] - Round 4:
(1 sc, inc, 1 sc) × 6times. [24 sts] - Round 5:
(3 sc, inc) × 6times. [30 sts]
Checkpoint: Confirm you have exactly 30 stitches. Keep the marker in the first stitch. Do not cut your yarn yet!
Part 2: The Ear Openings (Round 6)
This round forms the crucial comfort bridges that allow your pet’s ears to sit totally naturally.
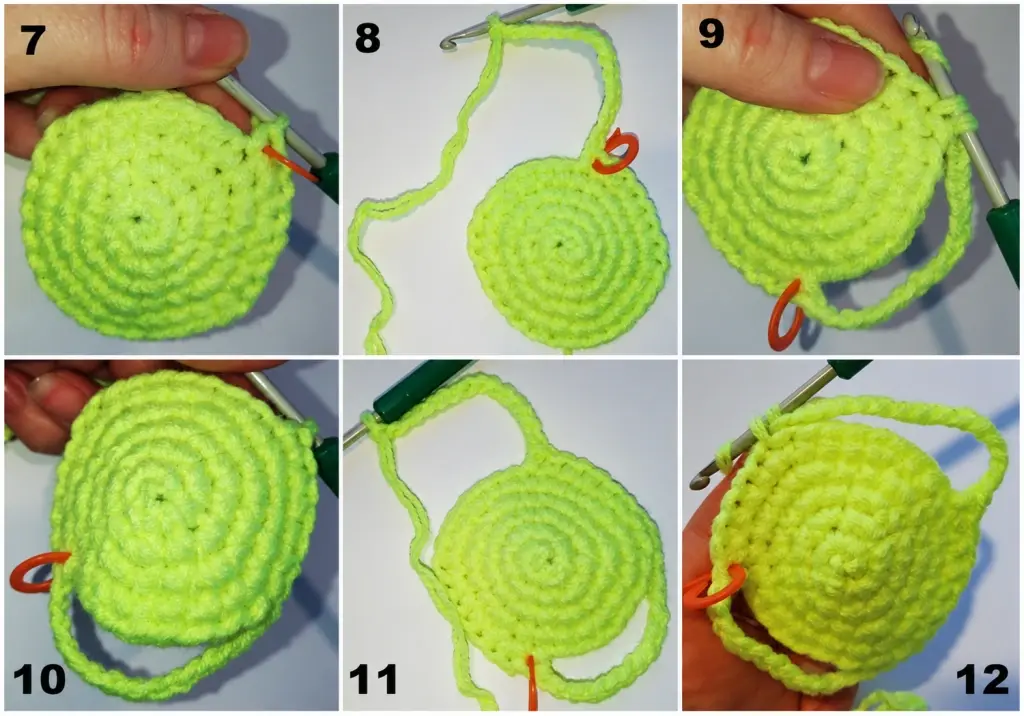
- Round 6: Work 1 sc. Chain 15, skip the next 8 stitches, work 1 sc in the following stitch. Work 6 sc. Chain 15, skip the next 8 stitches, work 1 sc in the following stitch. Work 5 sc to complete the round. [44 positions: 14 sc + 30 chs]
Checkpoint: Verify that neither chain-15 bridge is twisted. The 16 skipped stitches sit underneath the openings and will remain open.
Part 3: Shaping & Color Transition (Rounds 7–8)
Here we stabilize the ear arches and transition to our contrasting forest green edge.

- Round 7 (Yellow): Work 8 sc (working into each chain individually as you pass the bridges), 3 sc in the next stitch, 21 sc, 3 sc in the next stitch, 13 sc. [48 sts]
Cut both yellow strands leaving a 5 cm tail. Join Green yarn (2 strands held together) at the start of Round 8:
- Round 8 (Green): Work 8 sc, work 1 inc in each of the next 3 stitches (corner flare), 21 sc, work 1 inc in each of the next 3 stitches, 13 sc. [54 sts]
Part 4: Final Border Round & Edge Fasten-Off (Round 9)

- Round 9 (Green): Work 1 sc in each of the 54 stitches around without increases. [54 sts]
Cut both green strands leaving 5 cm tails. Enlarge the final working loop and draw the cut tails through it to lock the stitch neatly. Gently smooth the green edge flat.
Part 5: Hiding Ends & Tassel Fringe Preparation
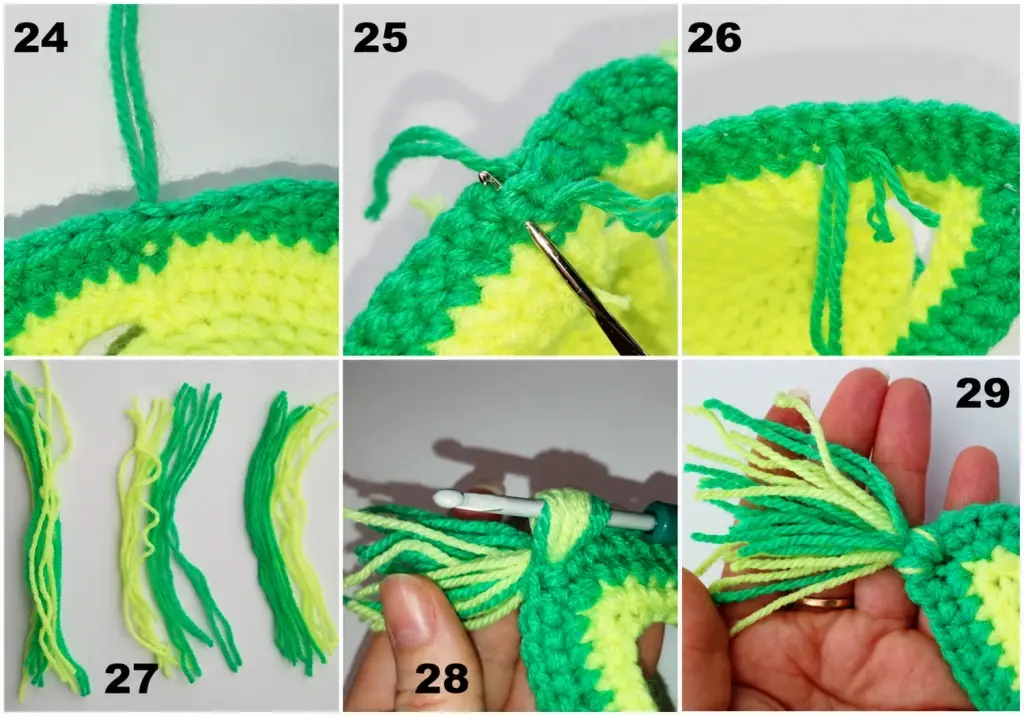
- Weave In Tails: Using your smaller 2.0 mm hook, guide all loose yellow and green tails through several dense stitches on the wrong side. Trim flush.
- Cut Tassel Strands: Cut 18 yellow strands and 18 green strands, each exactly 14 cm long.
- Form 3 Bundles: Divide the cut lengths into 3 equal bundles. Each bundle contains 6 yellow strands + 6 green strands (12 strands total). Fold each bundle in half to create 24 loose ends per tassel.
Part 6: Knotting & Trimming the 3 Tassels

- Crown Tassel: Insert your 4.0 mm hook from back to front through the center magic ring of the crown. Catch the fold of one bundle, pull a loop through, draw all 24 tails through the loop, and pull firmly into a neat larks-head knot.
- Flap Tassels: Repeat the attachment at the outermost shaped tip of each side flap.
- Final Trim: Comb the fringe straight with your fingers and trim with scissors for a neat, plush pompom effect!

Frequently Asked Questions (FAQ)
Will this crochet hat stay on my cat’s head?
Yes! Unlike flat or cone hats that rest clumsily between the ears, this flap hat incorporates two large 15-chain arches that allow your cat’s natural ears to poke straight through. The gentle crown curvature and soft side tassels provide natural balance without requiring tight chin straps.
How do I adjust this pattern for larger cats or kittens?
For larger cat breeds with wider ear spacing (like Maine Coons, Ragdolls, or British Shorthairs), increase the chain bridge on Round 6 from 15 chains to 18 chains and skip 10 stitches instead of 8. For kittens or petite cats, reduce the bridges to 12 chains.
Can I wash this crochet cat hat in a washing machine?
If made with 100% acrylic or mercerized cotton, hand washing in cool water with mild, pet-safe detergent is recommended to protect the delicate tassel fringe. Lay flat on a clean towel to air dry.
How do I download the PDF in other languages (German, French, Spanish, Italian)?
Our digital pattern listing on Etsy includes all 5 translated PDF files (English, German, French, Spanish, and Italian) in one instant download package. As soon as you complete your purchase on Etsy, you can download your preferred language edition (or all five) directly from your Etsy Purchases page.
We Share Free Premium PDF Patterns Every Week!
Join our weekly subscriber list to get free, ad-free printable PDF crochet patterns delivered straight to your inbox every week. Enter your email below to get this week’s pattern now!
🔒 100% free forever. No spam, ever. Unsubscribe with 1-click anytime.